03.3 — Advanced
Tagging & Classification
A Tag column sorts every row into exactly one of a fixed set of labels you define — and it's the one output type a human can correct afterward without re-running the AI.
Setting up a Tag column
Set a property's output type to Tag and add the list of allowed labels — "Invoice," "Purchase Order," "Other," whatever partition makes sense for your documents. The prompt's instructions are extended automatically: the model is told to return exactly one of those labels, nothing else.
For the case where nothing matches well, set If no match found to either Keep empty (leave the cell blank rather than force a bad fit) or Use LLM output as-is (let through whatever the model actually said, even if it isn't one of your listed options, so you can see what's slipping through).
Correcting a tag by hand
Click a Tag cell and you can pick a different label directly — no prompt edit, no re-run. This is the platform's most direct human-in-the-loop control: a teammate who knows a document was misclassified can fix it in one click, and that correction is the cell's new value going forward.
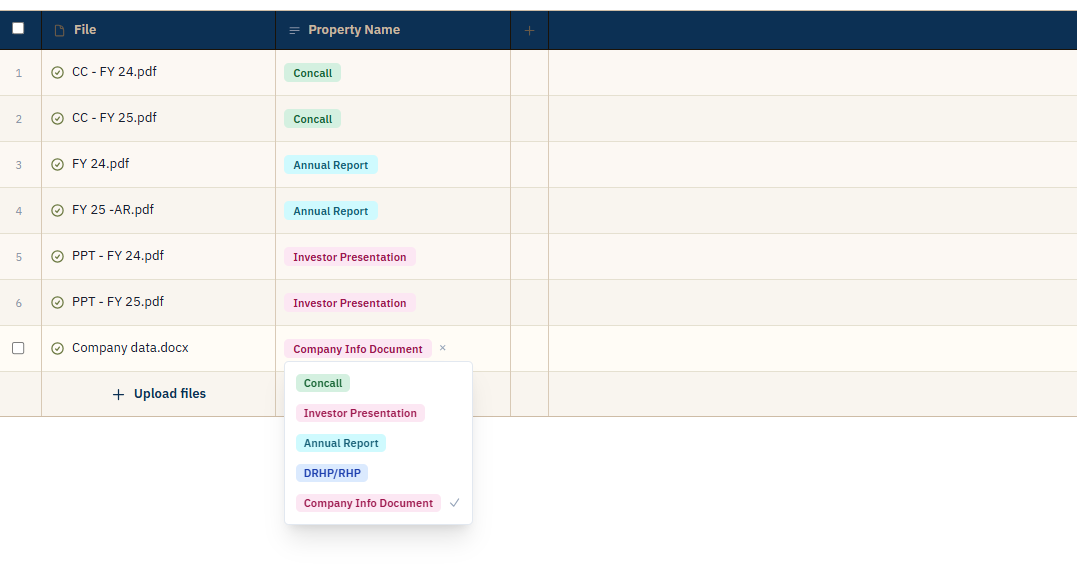
FIG. 10.1 — Overriding a tag takes one click, no AI re-run.
Using a tag to scope other prompts
Once files (or rows) are classified, other prompts can filter to just one label with
@class[Label] — for example, running a different question only against
rows tagged "Invoice." This is a retrieval filter, not a conditional branch: every
prompt still runs the same way for everyone, just against a narrower set of documents.
See Prompting 101.